tips & trends
Nail Art for Beginners: 5 Easy Nail Designs to Get You Started
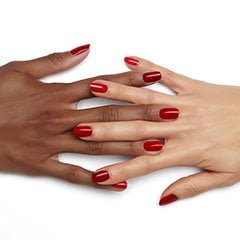
As much as we love a monochrome moment or a tasteful nude, nail art is our favourite vehicle for self-expression.
After all, nail art is wonderfully versatile – an outlet to articulate your unique personality, complement your fashion sense, or simply experiment with the latest nail trends.
While you might think nail art is reserved for the salon, there are a bunch of easy nail designs for beginners that you can recreate at home with essie’s extensive nail polish collection and a handful of tried-and-tested techniques.
Read on for five easy beginner nail art designs.
What is nail art – and can you do it at home?
Nail art goes beyond a single polish colour; it’s the practice of decorating your nails with patterns, designs, multiple colours, or embellishments for an elevated finish.
While specialised tools can certainly help with more intricate patterns, you can still create a wealth of beginner nail art ideas using regular nail polish and a few handy polish techniques – and yes, you can do it all from your own home!
Remember, nail art is about experimentation. It will probably take some trial and error to get the hang of nail art at home – but that’s where we can assist.
Easy nail art: 5 step-by-step designs for beginners
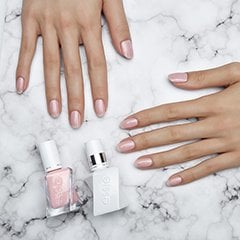
Nail art for beginners shouldn’t be complicated! You can achieve eye-catching looks with a few different shades of polish, along with a base coat and top coat to make your mani last as long as possible. Just make sure your nails are filed, buffed, cleansed, and hydrated (we swear by the apricot cuticle & nail oil to keep the area in top condition!).
Once your nails are prepped, it’s time to create!
From sweet, romantic patterns to stylish half-moon manis, read on for five of our favourite easy nail designs for beginners.
1. Pebbled polka dots
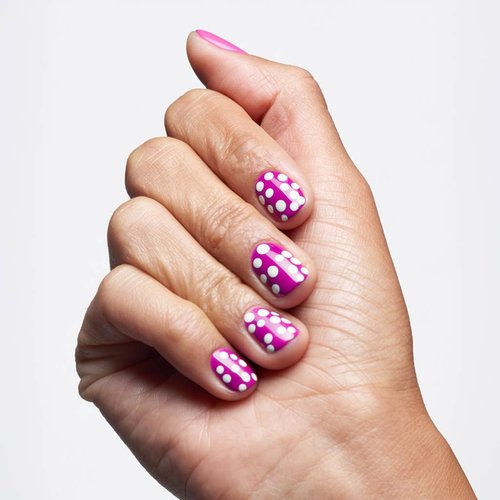
Polka dots are a classic for a reason.
As one of the simplest examples of nail art for beginners, there are so many iterations of the polka dot design – and no limit to your colour choices. Here at essie, we love a ‘pebbled polka dot’, since it doesn’t demand precision and adds a three-dimensional flourish.
- Apply your base colour, whether that be a neutral or a more vibrant shade. For the purpose of the nail art look, we’re opting for ‘lilacism’!
- Allow this colour to dry completely.
- Pick your polka dot colour. This might be a single classic white colour, like ‘blanc’, or multiple complementary colours like ‘get a mauve on’ and our mint-coloured ‘gel couture bling it’.
- Using the tip of your nail brush, drop dots of your chosen colour onto each nail. If using multiple colours, allow each colour to dry before moving onto the next.
- Don’t worry if the polka dots overlap – this will add to the textural effect.
- Seal with a top coat.
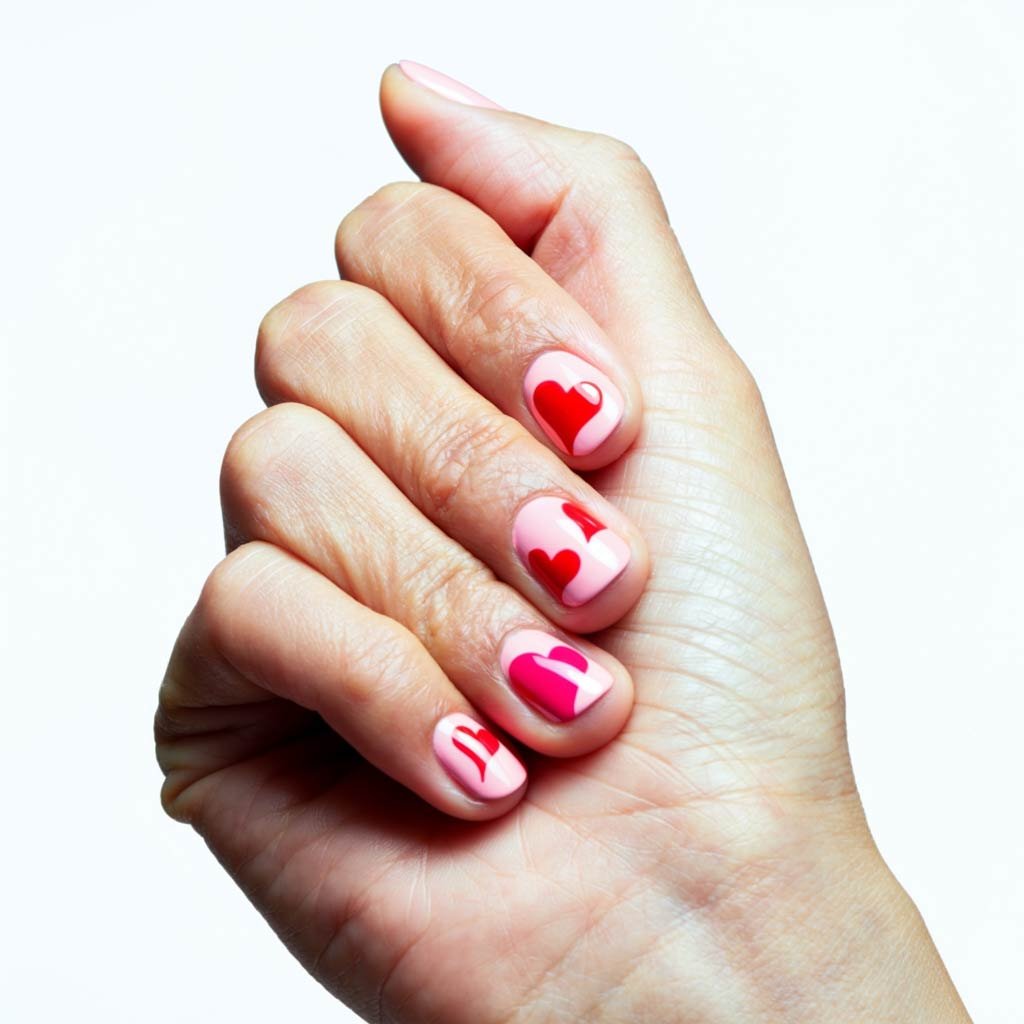
2. Sweetheart nails
Once you get the hang of polka dots, heart-shaped patterns are the natural next step.
There are a couple of heart-shaped easy nail designs for beginners to choose from: either heart-shaped French tips or mini heart accents. This stylish, romantic twist is perfect over a neutral nail base.
- Apply two coats of a creamy pink shade – like ‘fiji’ – letting each coat dry completely.
- For your heart pattern, pick a romantic shade of red.
- If you’re creating heart-shaped French tips, take your red nail polish and apply at the very end of your nail in a sort of ‘V’ shape. The shape of the nail brush will give you a rounded finish that looks like a heart.
- If you’re opting for mini heart accents, take your red nail polish on the end of a bobby pin like a ‘dotting tool’. Apply two dots next to each other and drag slightly from the centre to form a heart shape.
- Let your nail art dry fully, then seal with a top coat.
3. Glitz and glamour
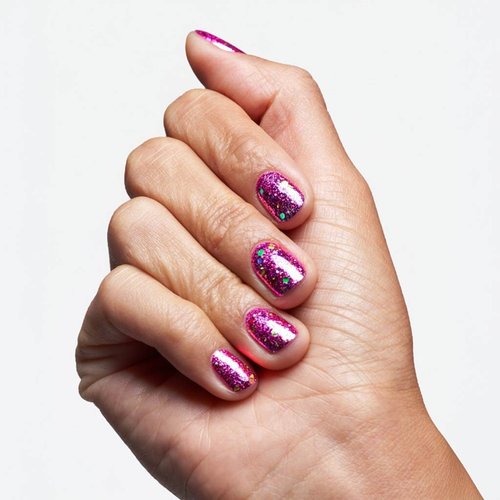
A glitter nail polish brings a touch of glamour to simple nail looks, creating a dazzling disco mirror ball effect. The best thing about this easy nail idea for beginners? It’s pretty much fool-proof. You can apply a glitter nail polish over virtually any shade of nail polish for an eye-catching shimmer.
- Start with two coats of your base polish – whether that be a colourful shade, or a neutral like ‘not just a pretty face’.
- Let your final coat dry completely.
- Now it’s time for glitter! For true disco ball vibes, reach for a silver shade – we love ‘set in stones’.
- If you’re livening up a nude or pale pink base shade, opt for our pink diamond glitter shade ‘a cut above’.
- Finish with a top coat.
4. Watercolour marble swirl
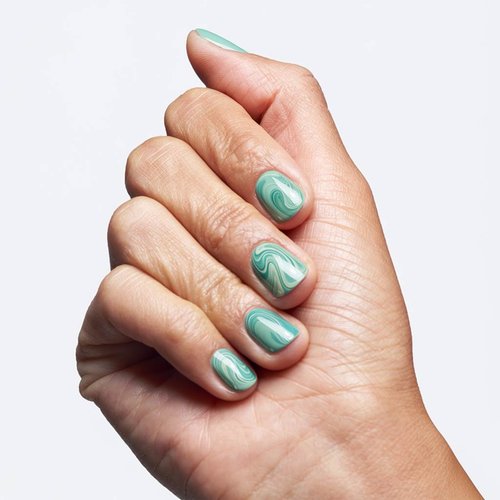
Swirl nail designs are the ultimate nail art for beginners because they look intricate – but are deceptively low effort. You can achieve a watercolour marble swirl design with a few different nail colours overlaid on a light base – like white or pastel shades. The key to nailing the watercolour marble effect is moving quickly to the next coat while your polish is still wet.
- After your base coat dries, apply a coat of the ‘marshmallow cloud’ nail polish.
- While your base is still a little tacky, take the ‘mint candy apple’ shade and apply to the diagonal corner of the nail.
- Follow immediately with our ‘sunday funday’ nail polish on the rest of the nail, overlapping slightly with the apple mint candy.
- Go back to your marshmallow nail polish and drag the brush through the two pastel shades in an ‘S’ motion from base to tip. This will create a soft, blended effect.
- Let these coats dry.
- To get that glossy marble finish, apply a coat of gel setter.
5. Half-moon mani
Looking for something chic, simple, and versatile? The half-moon mani is your go-to.
This retro-inspired design is a sophisticated twist on a French manicure that features a crescent moon shape at the base (either clear or coloured polish), with the rest of the nail painted in one solid colour.
We personally love something bold like ‘naughty nautical’ – a vivid turquoise shade.
- Apply a base coat to your nail and allow to dry.
- Pick your two colours: one for the ‘crescent moon’, one for the rest of the nail.
- Paint your entire nail with your crescent moon shade – it should be something light, that your solid colour will easily cover. Let it dry completely.
- Take your main solid colour and begin to paint, starting a few millimetres from the base of the nail. (Leave the moon exposed.) It should make a curved arch.
- Follow with a second coat and allow it to dry.
- Want to test your skills? Try the crimson eclipse nail art for beginners.
Moving through your easy beginner nail art designs with too much haste? Check out our tips on how long it takes nail polish to dry, and how you can streamline the drying process.